Page hits. I feel popular!

Monday, April 26, 2010

Nothing to report, sir

Well, not a whole lot to report but I did manage to get some things done this past week despite being busy with other things occupying my time and mind. It seems quite a few people involved with the Unicorn Group Build have been busy with some important things lately. Which reminds me, ASM you should contact me ASAP. Stories to tell.

Here's the end of the Bazooka. I masked it and painted the Silver Leaf however, the black did need to be touched up. The copic markers worked well and you can only see the marker marks if you look closely (which is exactly what my camera does when in macro mode...)
Here's the rest of the bazooka. The seam lines are in the process of being removed. I had to add some more glue to some seams to fill a gap. I try to use glue for that rather than break out the putty which is more time consuming.

And the lower half of the legs are almost complete. There are a lot of pieces on this thing! More decaling is needed before the final assembly of the legs will be finished. I think I could pound it out in one night if I wasn't so distracted right now.

You can see the piece that is painted a lighter gray than the majority of the armour on the knee joint. I wanted to break up this big mass of gray without resorting to Ver. Ka like decals. After the V Gundam, I live in fear of the Ver. Ka decals. In the natural light it looks pretty good.


I will have a whole week off starting on thursday. Hurray, for Golden Week! When I am not out and about I plan on jumping on this thing with enthusiasm in order to get it completed before the Musha Mk II arrives. I am still 面倒くさい about the putty work, though.


Monday, April 19, 2010

Messing about with Paint, Parts, and Decals


What's this thing?


It's actually the missile cartridge that slides into the bazooka. The first thing I did was glue it together and remove the seam lines, then follow that up with a coat of Mr. Surfacer.

I had pondered an idea way back when I was building one of my first Zaku IIs, but didn't want to mess up a Zaku so didn't follow through with it. This time I thought I would give it a go. If it turns out alright, I can incorporate it into my next Zaku, or maybe my sitting-here-since-last-year MG Zaku Cannon.

After the coat of Mr. Surfacer I sprayed some Mica Blue, then masked off the section that would stay, hopefully, Mica Blue. Then some Chrome Yellow, then some more masking, then some Semi Gloss Black.

Here is what it looks like when the layers of masking were removed this morning.


Look ma! No seam lines!


And now it is fully assembled (decaling to come)


(bad pic = bad presentation = my bad)

Thanks to the mother-in-law staying at my house for a week, I have become child-free for good chunks of time. I was able to do sections of decal work without a 2 and 1/2 year old girl jumping on me saying "Gundam! Watashi mo yaritai!"

I started with the pieces on the back of the leg. I needed to have them decaled and top-coated so I could piece them together with the leg frame before moving onto the next part of the leg frame construction.

And now my legs, or my Unicorn Gundam's legs I should say, look like this:


I was excited to get to this step because it meant I could see what my after market thrusters will look like.


Ya baby!

And my positioning of the aftermarket thrusters seems to be perfect, as the armour closes up without a problem, unlike what I discovered with my backpack thrusters.

I was also able to sit down one evening while Maw-in-Law was bathing and putting my daughter to bed and finish the rifle. The Wave decals turned out pretty well and I resisted the urge to overdo it.


I will get around to removing the seam lines on the Bazooka shortly and one of these days build up the courage to break open the putty and mutilate, I mean modify, the feet. Still a good amount of decaling to do as well.


Thursday, April 15, 2010

Ch-ch-ch, Changes


To start things off, I will give everyone a peak at the Unicorn head. There is some clean up left to be done, but you can get an idea what it will look like. The OVA unicorn doesn't have any decals on the head but there is some 'dead-space', particularly on the back of the head, that I am thinking of filling.

I have also begun the masking on the weapons. I won't be doing anything too extravagant, but I gotta make it mine, ya know?

This is from the bazooka:

Masked:

Unmasked:

And this is part of the barrel on the bazooka:

The bazooka will be silver and semi gloss black. I sprayed this piece black and then masked off the parts that will stay black before spraying the Silver Leaf. I will be taking a marker to do touch ups before topcoating. When I get home I will pull the masking tape off and see just how much touch up I have left for myself.

I should mention that right now my mother-in-law and grandmother-in-law are staying at my house for a week so I don't have lots of time to sit down and gunpla, but I am trying anyway!

The the elongated block for the center part of the rear of the skirt. I have glued and sanded and glued and sanded and came up with this (crappy picture):

After making this part longer I realized that the underside of the addition would be viewable when looking at the Unicorn from the front. Rather than have just a hollow, I decided to add something (not too difficult, of course) to make it a little more interesting.

This is all I could come up with:

I gave it a coat of Mr. Surfacer yesterday morning and then went out to paint it and, Oh noes!, had no more paint left in my spray can. Luckily there is one can available at work. It is now on my desk waiting to come home with me.

One of these days I should be feeling adventurous enough to tackle the feet.

Tuesday, April 13, 2010

One side

is finished!

Not really much to show, but I did manage to get one side of the rifle, and cartridge-like thingies, decaled this morning. To do so I had to get up at 6 am. I did get to bed early last night so it wasn't as hard as it sounds.

I picked up a set of WAVE decals from work for use on the Rifle, Bazooka, Gatlings, and Unicorn, although other than the feet there won't be much need for white decals on a gray Unicorn.


These decals are the same as the black ones I used on the Yellowbird.


They will make a splendid pair, desho.

Anyways, onto the pics!

Here's the rifle. I really like a well done rifle. This has been painted in Gun Ship Gray while the silver is, of course, Silver Leaf. I am considering using this gray on the Unicorn feet, which I am procrastinating about. I removed the rifle's seam lines fairly well, and only the opening separated slightly when I stuffed the silver piece in. (more details here.) Because everything went as planned, there isn't a need to do any touch up. Yay! Score one for the good guys!

And those cartridge-like thingies?

Mica Blue baby!

I spent the first few minutes, while shrugging off drowsiness, cutting these little suckers out one by one. One the decal sheet they are actually in one line with about a millimeter of space between. Ya, I need help. I'll spray topcoat tonight to hold these on and decal the other side in the next couple of days.

I have already used some of the dry transfers on the backpack, and used the larger ones for the Unicorn's shoulders. Other than that I won't be using them again. Well, I can use one of them with a slight adjustment.

We'll just cut away one of those words.

As a bonus to all you readers out there (笑), I am including this pic I snapped in the local mall the other day. On the 3rd floor there is a large hobby area with Gundam kits, and RC cars, and slot car race tracks, and two large Gundam statues! These things are over four feet tall!


Saturday, April 10, 2010

(slightly) Modify!

When I was doing the test build, one thing I noticed about the arms was that some of the psycho frame showed through even when in Unicorn mode. Let Dalong show you what I mean.


Look to the outside of the elbow joint part of the frame. You can see the red psycho frame. Yada! What can I do about this? I considered using mesh tubing, but finding one that small may prove difficult. I then thought about covering that gap with some plastic, but that would interfere with the rotational movement (even though I don't know why this part has hinges anyway).


Here's the pieces in question:

My solution?

Enter the 0.03 mm styrene!

Now wouldn't it be nice if the styrene width was the perfect length for that gap? Of course it would be nice. However, life doesn't work that way.

I took my trusty Buzz Lightyear ruler (don't make me post pics) and measured the gap to be about 6 mm by 3mm. I then cut that size out of the styrene and test fitted it. Too large. After some trimming I got it to the right size.

I won't be using glue to hold this in place because I want this piece to be able to pivot as it is a hinge of some sort. The paint will be what holds this piece in. As you can see, it still rotates!

Success!

Success times four!

This is the easiest modification I will be attempting on this kit. The next modification will be done to the feet and, as it involves putty, will be much more difficult. Even moreso when you consider my inexperience with using putty.

Then the secret modification that will blow your minds (should I pull it off).


Thursday, April 8, 2010

Modify!


So I can't leave well enough alone...

This is the middle piece of the back of the skirt (Ver. Ka use). In the Ver Ka kit this piece was too long and interfered with the rotational movement of the torso. Bandai rectified this on the new OVA kit, however, I still didn't like the look of the piece. Am I ever satisfied?

Let Dalong show you what I mean.
You can see that the central block of the rear skirt armour looks rather short when compared to the pieces on either side of it. I wanted to try and make it slightly longer.
Using the old central block that is now a spare part on the OVA kit I took my trusty saw and, well, you already saw that part. Get it? 'saw that part'! I'm awesome today!

Let's glue these pieces together!

I will let that sit for a couple of days and maybe add some more glue or just move right to the putty part. Then sanding, mr. surfacer, and painting.

Here's how the front of the shield turned out after taking the masking off.
Apologies for the quality of the pic. The iphone was handy and I snapped these pics rather than get up and look around for the camera. Don't waste time when you can Gunpla, folks!

And the moving pieces of the shield are also finished, although I may add a panel line or two.

If you look carefully, and have good lighting (none of which is featured in this pic taken hastily this morning) the metallic blue piece is still transparent. Success!

When not working on the Unicorn I have caught myself daydreaming about it. I am sure I am not alone in this regard however I am reluctant to state it openly (especially to women). These daydreams let me to come up with an idea.

If I can pull it off, epicness! Is epicness even a word? My word processor says otherwise. epicnicity?

I will be getting a hold of some extra parts courtesy of ASM and Bandai and will use them towards the epic. This part will be kept secret.


Sunday, April 4, 2010

Slowly but surely


The title pretty much sums it up. With the inconsistent weather and the large number of pieces that need to be prepped, (primed), painted, and coated I have been chugging along. I would guess that I am about halfway through the build now.

Things finished:

*Frame is painted and flatcoated.

*main body armour and head is painted and for the most part topcoated in prep for decal work.

*Rifle has had the panel lines removed and is painted. Waiting to topcoat.

*Assembly of frame with psycho frame is as far along as it can be before needing to add armour.

I have some bits and pieces to show (off).

The results of the masking on the shield part:

The pieces that make up the ankle joint:Why did I do that?

So it looks like this:
I really like my gundam to have moving parts that stand out. That's why I am usually painting pistons and levers and things of the like.

Things left to be done:

*Paint the bazooka. (There will be masking.)

*Decal (everything)

*Paint and top coat the leg armour.

*Cut, sand, and paint the hands.

*Mask the shield for the next stage of painting

*Panel line (everything)

*Modify the feet. (I bought some milliput and I want to give that a try. If it fails I will be ordering some replacement pieces from Bandai). (and I still don't know what color the feet will be; Olive Drab to match the backpack? Gunship Grey to match the rifle? Black? Red?.. Red??)

After writing this I will have to reevaluate my position and state that I do not think I am halfway finished.

Back to the gunpla!

Thursday, April 1, 2010

Back of the pack!

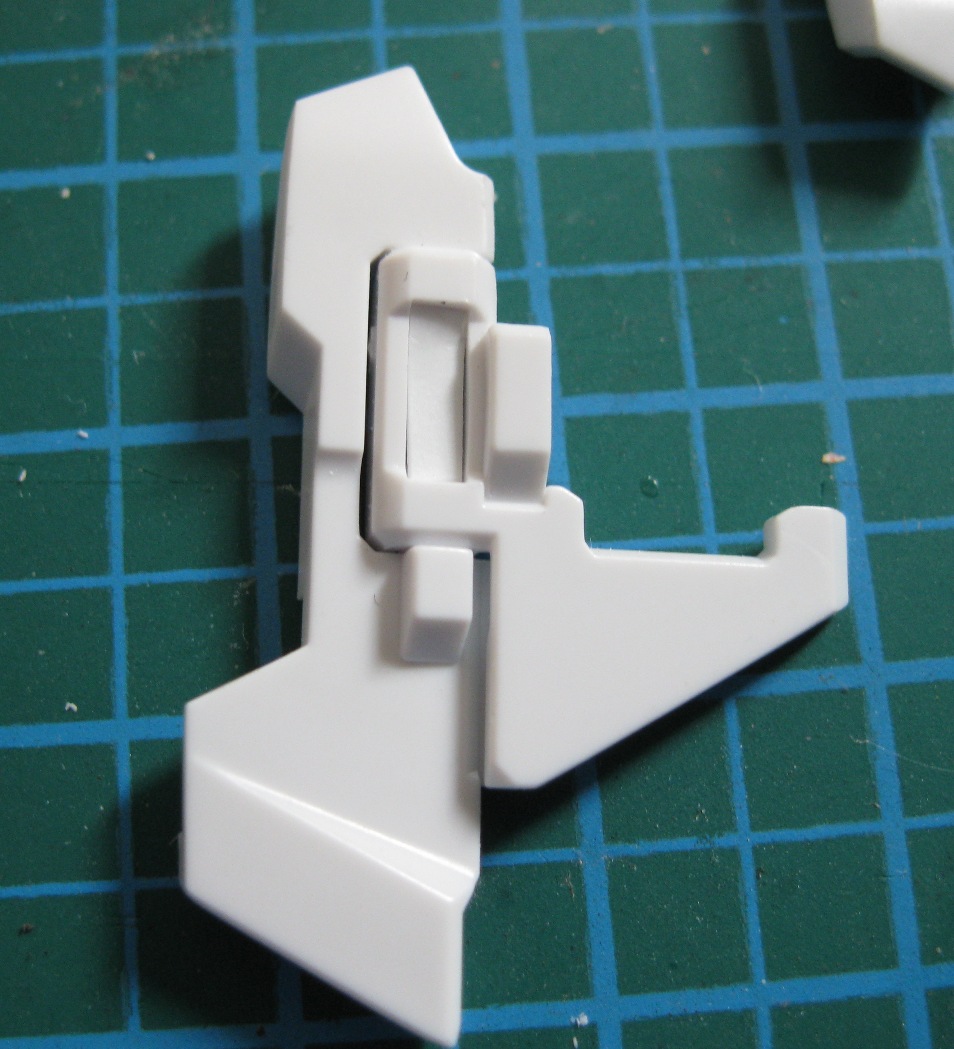
I have left the armour pieces to the Unicorn to the side in order to focus on the backpack. Why the backpack? Because I am using aftermarket thrusters and they look cool! Also, the backpack is rather simple, consisting of few parts, which means that it doesn't take a lot in the way of time to finish it.

Two nights ago I rubbed on the dry-transfers that came with the kit. They aren't overstated like Ver Ka transfers would be and there aren't a lot of them. Don't overdo it folks!

While the transfers on the left side of the backpack went on flawlessly, that was not the case for the right side. Things started to get misaligned and the transfers started sticking on their own so I had to rub them on or risk ruining them further. Once they were on I compared the right side to the left and noticed that things weren't quite symmetrical. I demand symmetry! Thusly, I scraped off some of the dry transfer on the left side so they would match the right side and vice versa. I am satisfied with the result.

After the transfers were applied I left them until the next morning which, thankfully, was sunny and clear and it was then I applied the flat coat. That night (yesterday) I returned home and put the backpack together. It was then that I could move onto the last part; the lower thrusters.

This is my second time using after market parts, the first being on my 
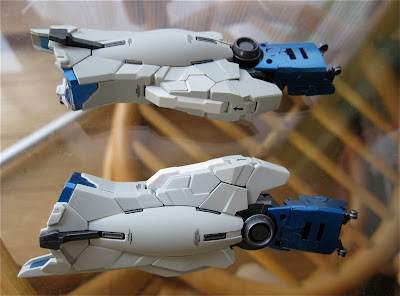
Hi-Nu. I want the metal thrusters seen well when the kit is viewed from behind. The kit has the thrusters pointing downwards which would mean that someone viewing my Unicorn would not be able to see the clear blue I painted onto the inner thruster. But I want people to see it (and I want to see it too).

The solution: taking my nippers I cut the ball which is used to attach to the plastic thrusters at an angle leaving a flat surface directed more upwards. I drilled the holes and prepare my aftermarket thrusters; put them together and snip off the majority of the shaft leaving only a small length that is needed to go into the drilled hole.

I test fitted the thrusters first to see if they were both pointing the proper direction and had the look I wanted to achieve.

As you can see, the alignment on the right thruster is not quite correct.
In order to remedy this I had to slightly redrill the hole and also cut the shaft smaller. Then hold it in position while the glue took hold. This pictures shows the second test fit and how it is closer to being correctly aligned.

It has since been corrected by me (hopefully).

I noticed when transforming the backpack, read as opening the side flaps, that the metal thrusters scrape on some plastic inside. It seems my measurements were not quite correct. However, being that the thrusters are metal, they won't wear down but will instead just scrape a groove of their own in the plastic. As this isn't visible it's no problem.

Til next time.